See how to accurately measure screw spacing and sizes on wall switchplates using inches or centimeters. These dimensions are important if you are trying to find unusual or vintage light switch covers or wish to have a custom wall plate made.
Are You Mounting to a Box or a Device?
First, make note of whether your cover plate will screw into the electrical box (as with a blank or deep cover), or if it's screwing into a device or strap (as illustrated below with Strap Mount and Device Mount cover plates).
This will determine the screw hole spacing that you need to measure.
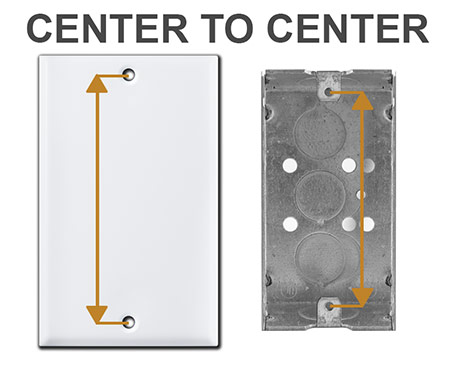
Screw spacing is measured center to center.
Place a ruler or tape measure against the plate or electrical box holes to get a precise measurement.
Get the distance from the center of one screw hole to the center of the opposite screw hole (down to 32nds of an inch if need be).
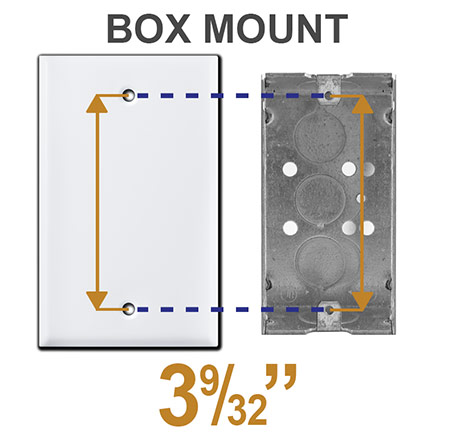
If you simply need a blank plate to cover an unused electrical box, you should measure the distance between the mounting screw holes on the electrical box.
This is Box Mount spacing.
Standard electrical boxes have screw holes spaced 3-9/32" apart center to center.
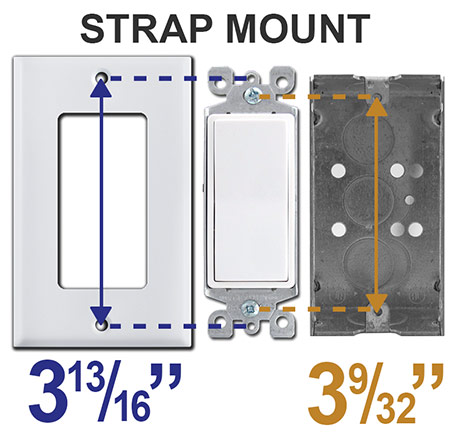
Some cover plates don't screw into the electrical box directly, but instead screw into the outer strap of the device that's mounted in the box.
This is known as Strap Mount.
The orange dotted line shows where the device mounts into the box.
The blue dotted line depicts where the plate screws into the "strap" of the device.
Two very common devices that required a strap mount cover are the Decora Rocker Switch and the GFCI Block Outlet.
When measured closely, these strap mount plates for Decora Rocker/GFCI devices have a screw spacing of 3-13/16" center to center.
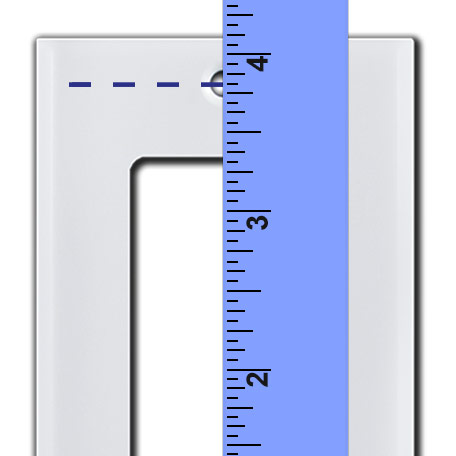
When taking a measurement, be certain to look for the smallest increment on your ruler or tape measure.
Here, our ruler has markings every 1/16" of an inch.
This measurement is close to 3-3/4", but the correct measurement is 3-13/16".
Precision is important when taking measurements to ensure you don't order a cover plate that won't fit your needs.
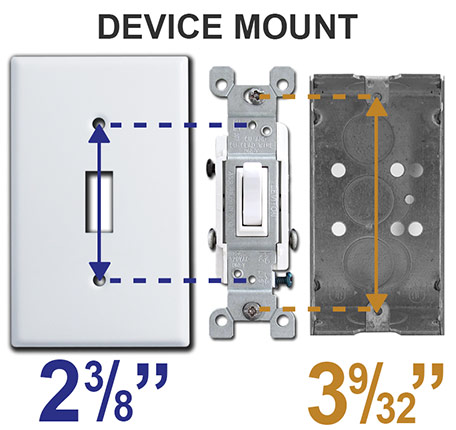
Device mounted plates screw into the device (such as the toggle light switch shown here) and have a smaller screw spacing of 2-3/8".
How to Measure Non-Standard Screw Hole Spacing
If you have an odd-sized electrical box, you're screw spacing may be different.
Follow these tips to get an accurate measurement of the screw spacing for your unusual electrical box.
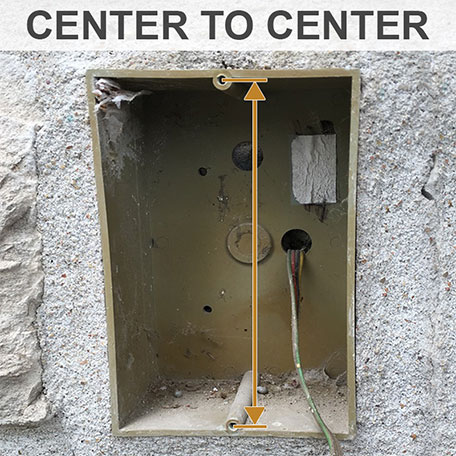
Remember, you want to measure from the very center of the screw openings.
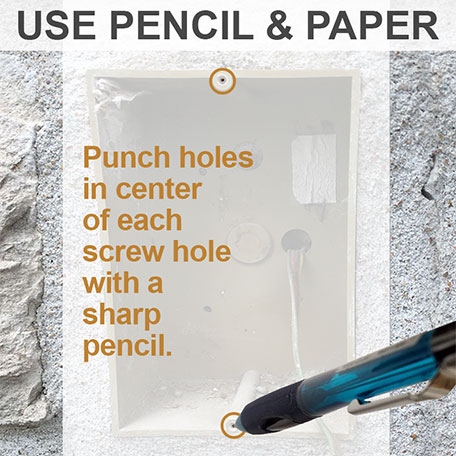
If you find it difficult to get an accurate measurement - perhaps if the surface is uneven or the box is sunken into the wall - use a piece of paper to assist you.
Hold up a sheet of paper and punch a hole in the center of each screw hole using a sharp pencil.
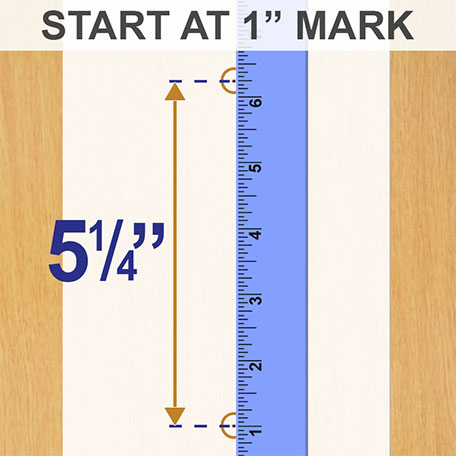
Lay the paper on a flat surface to measure the spacing.
It's best to start your measurement at the 1" mark, then subract 1" from your final measurement.
Be sure to align the center of the ruler markings with the punched out holes, as best as you can.
If easiest, use the mm markings to get the smallest increment possible.
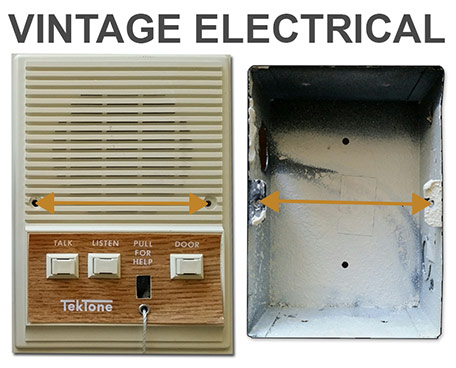
Here is an example of a vintage TekTone Intercom System.
To determine which blank electrical box cover is the right fit, you simply measure the overall height and width of the box itself, along with the screw spacing.
Our 7.5" high x 5.5" wide blank covers for TekTone intercom boxes have a screw spacing of 3.75" (center to center).
How to Measure Round or Domed Light Switches
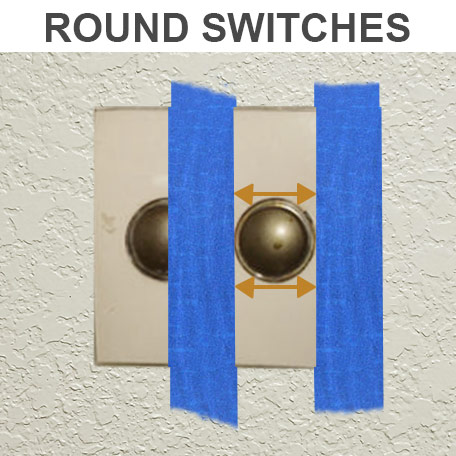
Measure difficult switches such as these round, domed taplights, by running painter's tape up and down each side of your switch.
Then measure the distance between each piece of tape (just above and just below the switch).
Make sure the measurements come out the same on the top and bottom. If not, keep adjusting the position of your tape until measurements are equal.
